

 Search
Follow the checklist for a smoother Standard Checkout Integration and a better payment experience for the users.
Sequence
- PG Pay API – Generic Handling
- PG Pay API – UPI Open Intent Flow [Custom]
- PG Pay API – UPI Collect Flow [Custom]
- PG Pay API – UPI QR Flow [Custom]
- PG Pay API – New Card Flow [Custom]
- PG Pay API – NetBanking Flow [Custom]
- PG Check Status API
- Server-to-Server Callback Handling
PG Pay API – Generic Handling
- The amount parameter should be in paise.
- The callbackUrl parameter should be passed in the request payload on which the server-to-server callback will be sent by PhonePe.
- The merchant should be passing the merchantUserId and merchantTransactionId parameters in the request payload.
- It should be only alphanumeric
- No Special characters are allowed except underscore “_” and hyphen “-“
- The length should be less than 35 characters
- After the completion of the payment and getting the UI callback from PhonePe, merchants should always check with their backend server if the server-to-server callback is received to confirm the payment status. If not received, the PG Check Status API should be called.
PG Pay API – UPI Open Intent Flow [Custom]
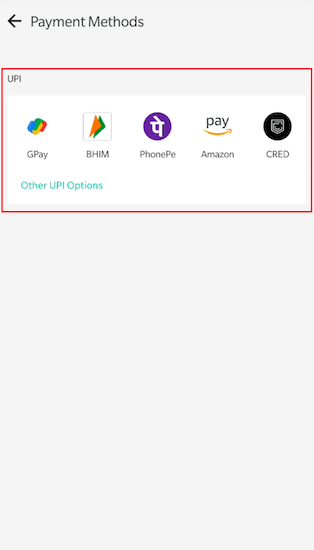
- Merchants should display the Custom UI containing the list of UPI apps present on the user’s device on the checkout page under the UPI Section.

- The merchant should be passing paymentInstrument.type as “UPI_INTENT” in the request payload.
- The merchant should be passing deviceContext.deviceOS parameter in the request payload based on the mobile platform Android or iOS.
- Android
- The merchant should be passing paymentInstrument.targetApp with the package name of the UPI App selected by the user on the checkout page.
- If the merchant is using PhonePe Android SDK, then AppId has to be passed. Reference Link
- iOS
- The merchant should be passing paymentInstrument.targetApp with the static value of the UPI App selected by the user on the checkout page. Example: PHONEPE, PAYTM, GPAY.
- If the merchant is using PhonePe iOS SDK, then AppId has to be passed. Reference Link
PG Pay API – UPI Collect Flow [Custom]
- The merchant should provide a text field for the user to enter the UPI ID on the merchant checkout page.
- The merchant should provide a Verify Button to verify whether the UPI ID entered by the user is Valid or not.
- If Valid – then the message “Verified” can be shown to the user and the Pay button should be enabled.
- If Invalid – then the error message should be shown to the user.
- Once the Collect Request is raised after clicking the Pay button, the timer should be shown on the merchant checkout page for 8 mins (480 Secs).
- The merchant should be passing paymentInstrument.type as “UPI_COLLECT” in the request payload.
- The merchant should be passing paymentInstrument.vpa with the verified VPA entered by the user in the request payload.
PG Pay API – UPI QR Flow [Custom]
- The merchant should be passing paymentInstrument.type as “UPI_QR” in the request payload.
- In the response, the merchant will receive both qrData and intentUrl. Either of those can be converted to QR image and then displayed to the user on the Checkout Page.
- Along with the QR image, the timer should be shown on the merchant checkout page for 8 mins (480 Secs).
PG Pay API – New Card Flow [Custom]
- In the PAY API, the redirectUrl and redirectMode parameters in the request payload.
- The merchant should be passing paymentInstrument.type as “CARD” in the request payload.
- The merchant should be passing saveCard should be passed as False
- The merchant should be passing encryptedCardNumber with the value obtained by RSA encrypting the 16-digit card number using the Encryption Key provided by the PhonePe team.
- The merchant should be passing encryptionKeyId with the numeric value of the Encryption Key Id provided by the PhonePe team.
- The merchant should be passing encryptedCvv with the value obtained by RSA encrypting the 3-digit CVV using the Encryption Key provided by the PhonePe team.
- The merchant should be passing authMode, expiry.month and expiry.year parameters in the request payload.
PG Pay API – NetBanking Flow [Custom]
- The merchant should call the Payment Options API with includeNetBankingBanksList as True to fetch the list of Netbanking supported and its respective BankId.
- The merchant should display the received Bank List on the checkout page with their icons.
- In the PAY API, the redirectUrl and redirectMode parameters should be passed in the request payload.
- The merchant should be passing paymentInstrument.type as “NET_BANKING” in the request payload.
- The merchant should be passing the bankId parameter in the request with the bankId of the bank selected by the user on the checkout page.
PG Check Status API
- If the payment status is PAYMENT_PENDING or INTERNAL_SERVER_ERROR, then there can be two possibilities.
Option 1:- The transaction can be marked as Failed by the merchant and the Payment Failure page can be shown to the users on the UI.
- At the same time, the transaction has to be reconciled on the server side till the terminal status Success/Failure is reached. If successful, then the Refund has to be initiated.
Note: For this use case, it is highly recommended to integrate the Refund API.
Option 2: - The transaction can be marked as Pending by the merchant and the Payment Pending page can be shown to the users on the UI.
- At the same time, the transaction has to be reconciled on the server side till the terminal status Success/Failure is reached. If it is successful, then the Order can be fulfilled.
- For PAYMENT_PENDING and INTERNAL_SERVER_ERROR, the reconciliation process must be setup, and the recommended frequency interval of PG Check Status API as follows:
Check Status API – Reconciliation [MANDATORY]
If the payment status is Pending, then Check Status API should be called in the following interval:
The first status check at 20-25 seconds post transaction start, then
Every 3 seconds once for the next 30 seconds,
Every 6 seconds once for the next 60 seconds,
Every 10 seconds for the next 60 seconds,
Every 30 seconds for the next 60 seconds, and then
Every 1 min until timeout (15 mins).
Server-to-Server Callback Handling
- Once the S2S response is received, the checksum value in the headers of the S2S Response must be validated with the checksum calculated at the merchant’s end.
- Only when the checksum is valid, the status of the transaction should be updated at the merchant’s end.