Search
How to integrate PhonePe PG with your WooCommerce website?
Step 1 : Log into your WordPress website with admin credentials.
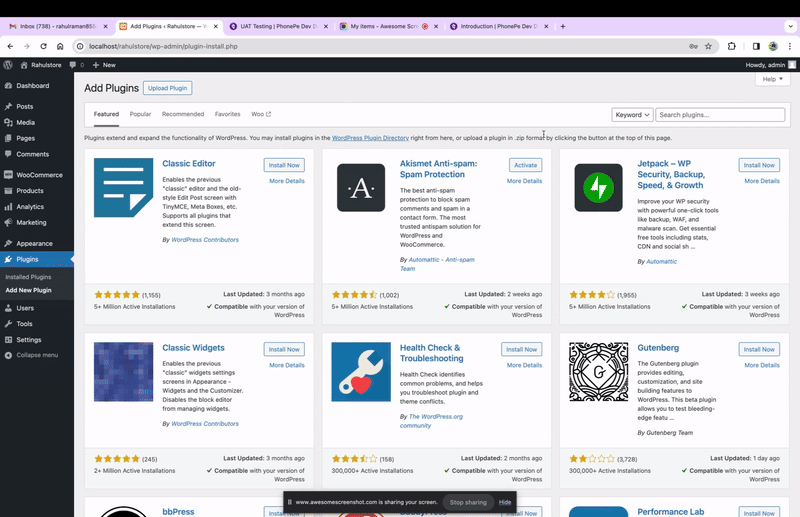
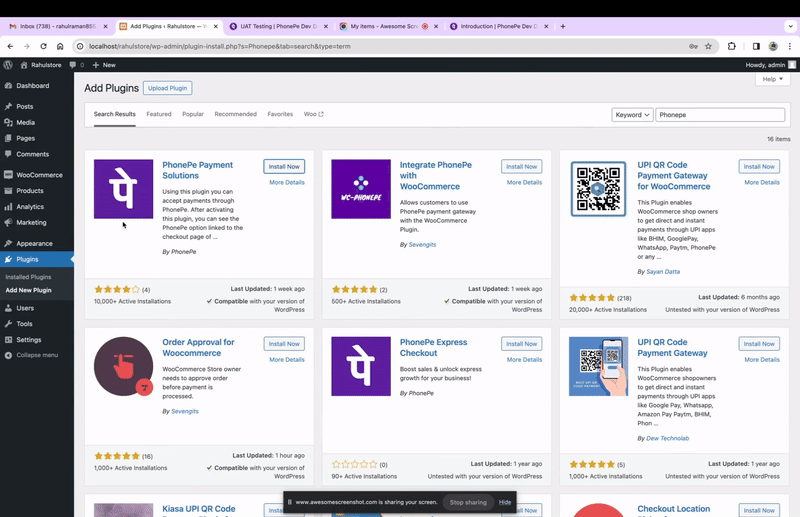
Step 2 : Click Plugins, select Add New Plugin, search for PhonePe Payment Solutions and click Install Now :
Step 3 : Next, click Installed Plugins to confirm successful installation and click Settings
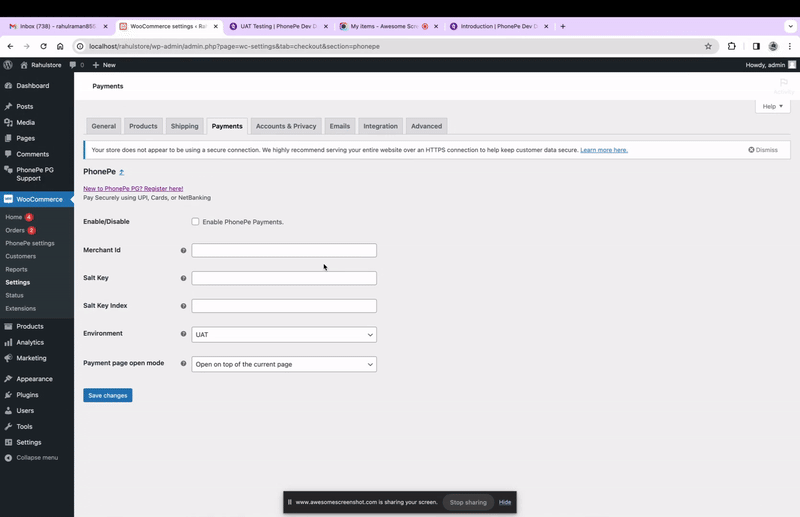
Step 4 : Enable PhonePe Payments and enter the required details based on whether you want to test in a stage or prod environment.
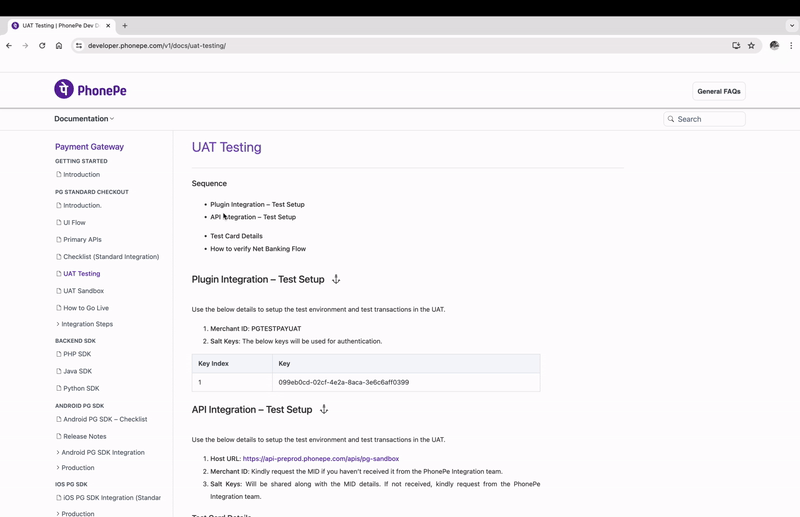
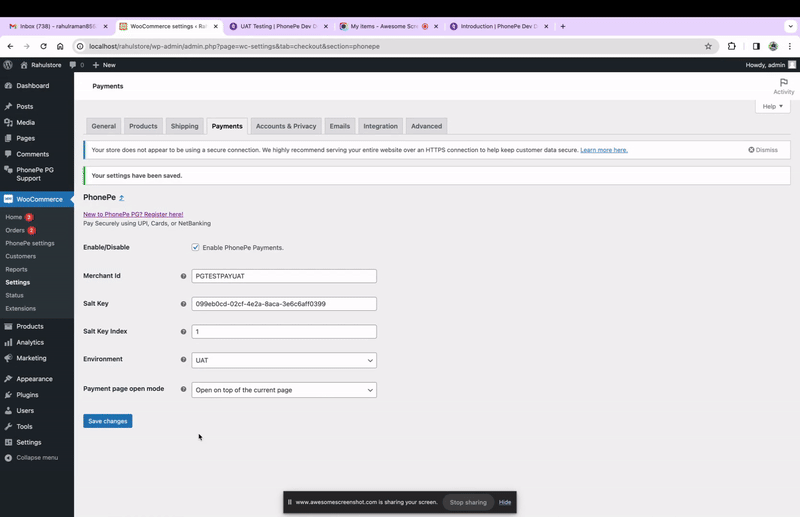
Step 5 : If you want to test in a stage environment, you can get all the required details except MID from https://developer.phonepe.com/v1/docs/uat-testing and click Save changes.
Note : For Prod, log into business.phonepe.com > Developer Settings for the details.
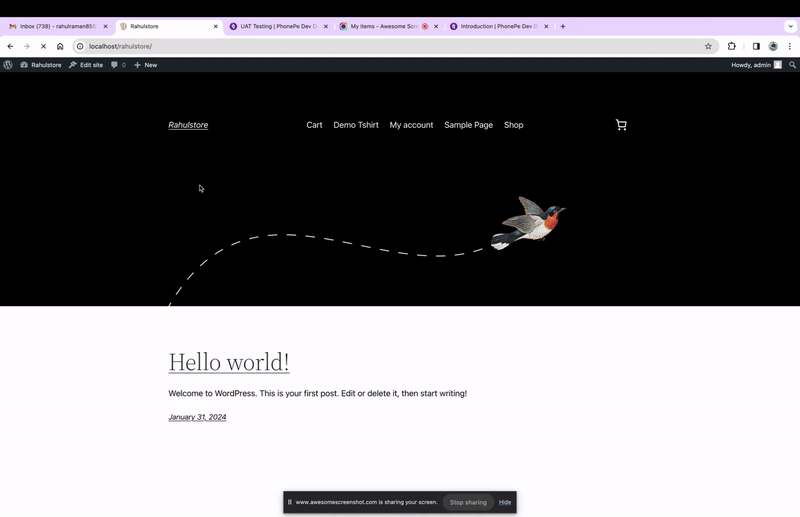
Step 6 : Click the name of your website and click Visit Site.
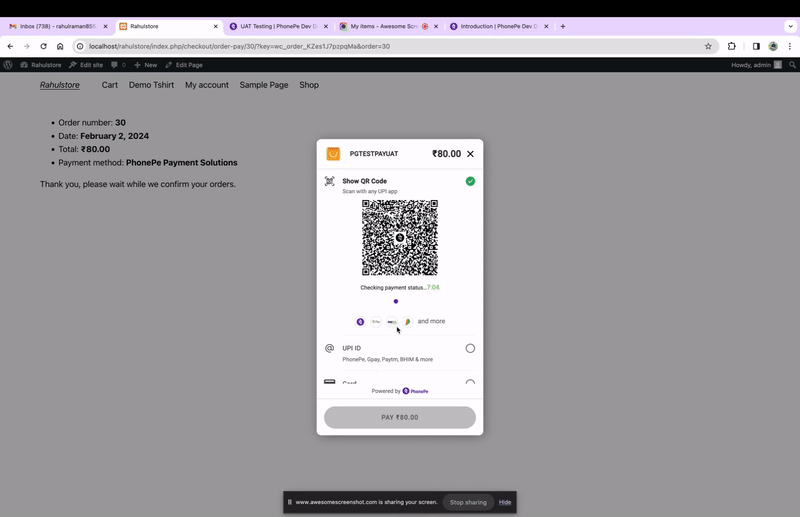
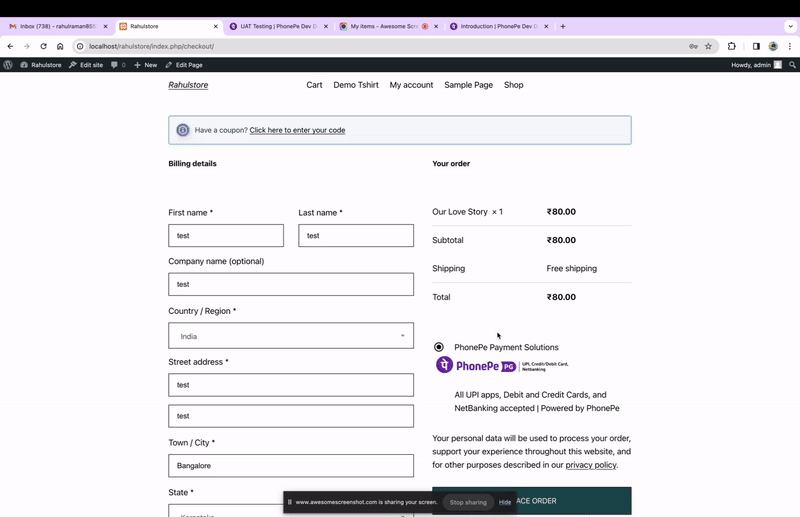
Step 7 : Now, add any product to the cart and click Proceed to checkout.
Step 8 : You’ll be able to see the PhonePe PG Gateway screen.
Step 9 : Select your preferred payment mode and make the payment.