Transactions
Live Transactions
The “Live Transactions” page provides a real-time view of your most recent transactions. This page is designed to give you an immediate overview of payments as they occur, ensuring you stay updated with your business’s financial activity.
This page allows you to monitor the latest 20 transactions in real-time, helping you quickly verify new payments and track immediate sales.
Key Elements & Sections:
- Live from [Time]: Indicates that the data displayed is live and updates frequently.
- Filters:
- Store Filter: Allows you to filter transactions based on specific stores if you operate multiple outlets.
- Terminal Filter: Enables filtering transactions by individual terminals within your stores.
- Refresh Icon: Located at the top right, this icon allows you to manually refresh the transaction data.
- Transaction Reports Link: (Top right) A clickable link to navigate to the detailed “Transaction Reports” section for more in-depth analysis and historical data.
- View Older Transactions / Transactions History Link: (Bottom center, and also as a tab) A link to access the “Transactions History” page, where you can view all your past transactions.
Typical Use Case:
A store manager/cashier can keep this page open during business hours to instantly see incoming payments, verify customer transactions, and ensure smooth operations without needing to manually refresh.
Relevant Screenshots:
Transactions History
The “Transaction History” page provides a comprehensive record of all your past transactions, allowing you to review, search, filter, and analyze your business’s financial data over any desired period. This page is crucial for reconciliation, reporting, and in-depth understanding of your transaction trends.
This page allows the user to access, filter, search, and analyze their complete transaction records, facilitating reconciliation, reporting, and historical data review for last 6 months.
Key Elements & Sections:
- Date Selector: Allows you to select a predefined period (e.g., “This Month”, “This Week”, “Today”) or a custom date range to view transactions.
- Filters: Clicking the “Filters” button opens a modal window with various filtering options:
- Transaction Status: Filter by “Completed,” “Pending,” “Failed,” or “Cancelled” transactions. You can also “Select All.”
- Mode of Payment: Filter by specific payment methods (e.g., PhonePe, other UPI apps, debit cards, etc.).
- Store: Filter transactions by specific stores if you manage multiple locations.
- Terminal: Filter transactions by individual terminals.
- QR Code: Filter transactions specifically linked to certain QR codes.
- Search Bar: Allows you to search transactions by various criteria, such as “Phone no,” “Txn ID/UTR,” “Store ID,” or “Terminal ID.” This provides quick access to specific transaction details.
- Refresh Icon: Allows you to manually refresh the transaction data.
- Three-dot (More Options) Menu: This menu typically contains additional functionalities related to the data display, such as:
- Print Summary: Allows you to generate a printable summary of the displayed transactions.
- Additional Columns: To select which columns you wish to view or hide in the table.
- Summary Metrics:
- Transactions Count: Displays the total number of transactions matching your current filters and date range.
- Total Transactions Amount: Shows the cumulative amount of all transactions matching your current filters and date range.
- Transaction Table: Displays detailed information for each transaction. Columns include:
- Date: Date and time of the transaction.
- Transaction Reference: Unique ID for the transaction.
- Status: Current status (e.g., COMPLETED).
- Amount: Transaction value.
- Payment Mode: Method of payment.
- Store: Store where the transaction occurred.
Typical Use Case:
A business owner or accountant can use this page to reconcile daily or monthly transactions, generate reports for financial analysis, investigate specific payment issues by searching for transaction IDs, or monitor performance across different stores or payment methods.
Relevant Screenshots:
Refunds
The “Refunds” tab provides a comprehensive overview of all refund and reversal transactions processed. This section is divided into two primary sub-tabs: All Refunds and Bulk Refunds, catering to both individual refund tracking and mass refund processing.
Refunds > All Refunds
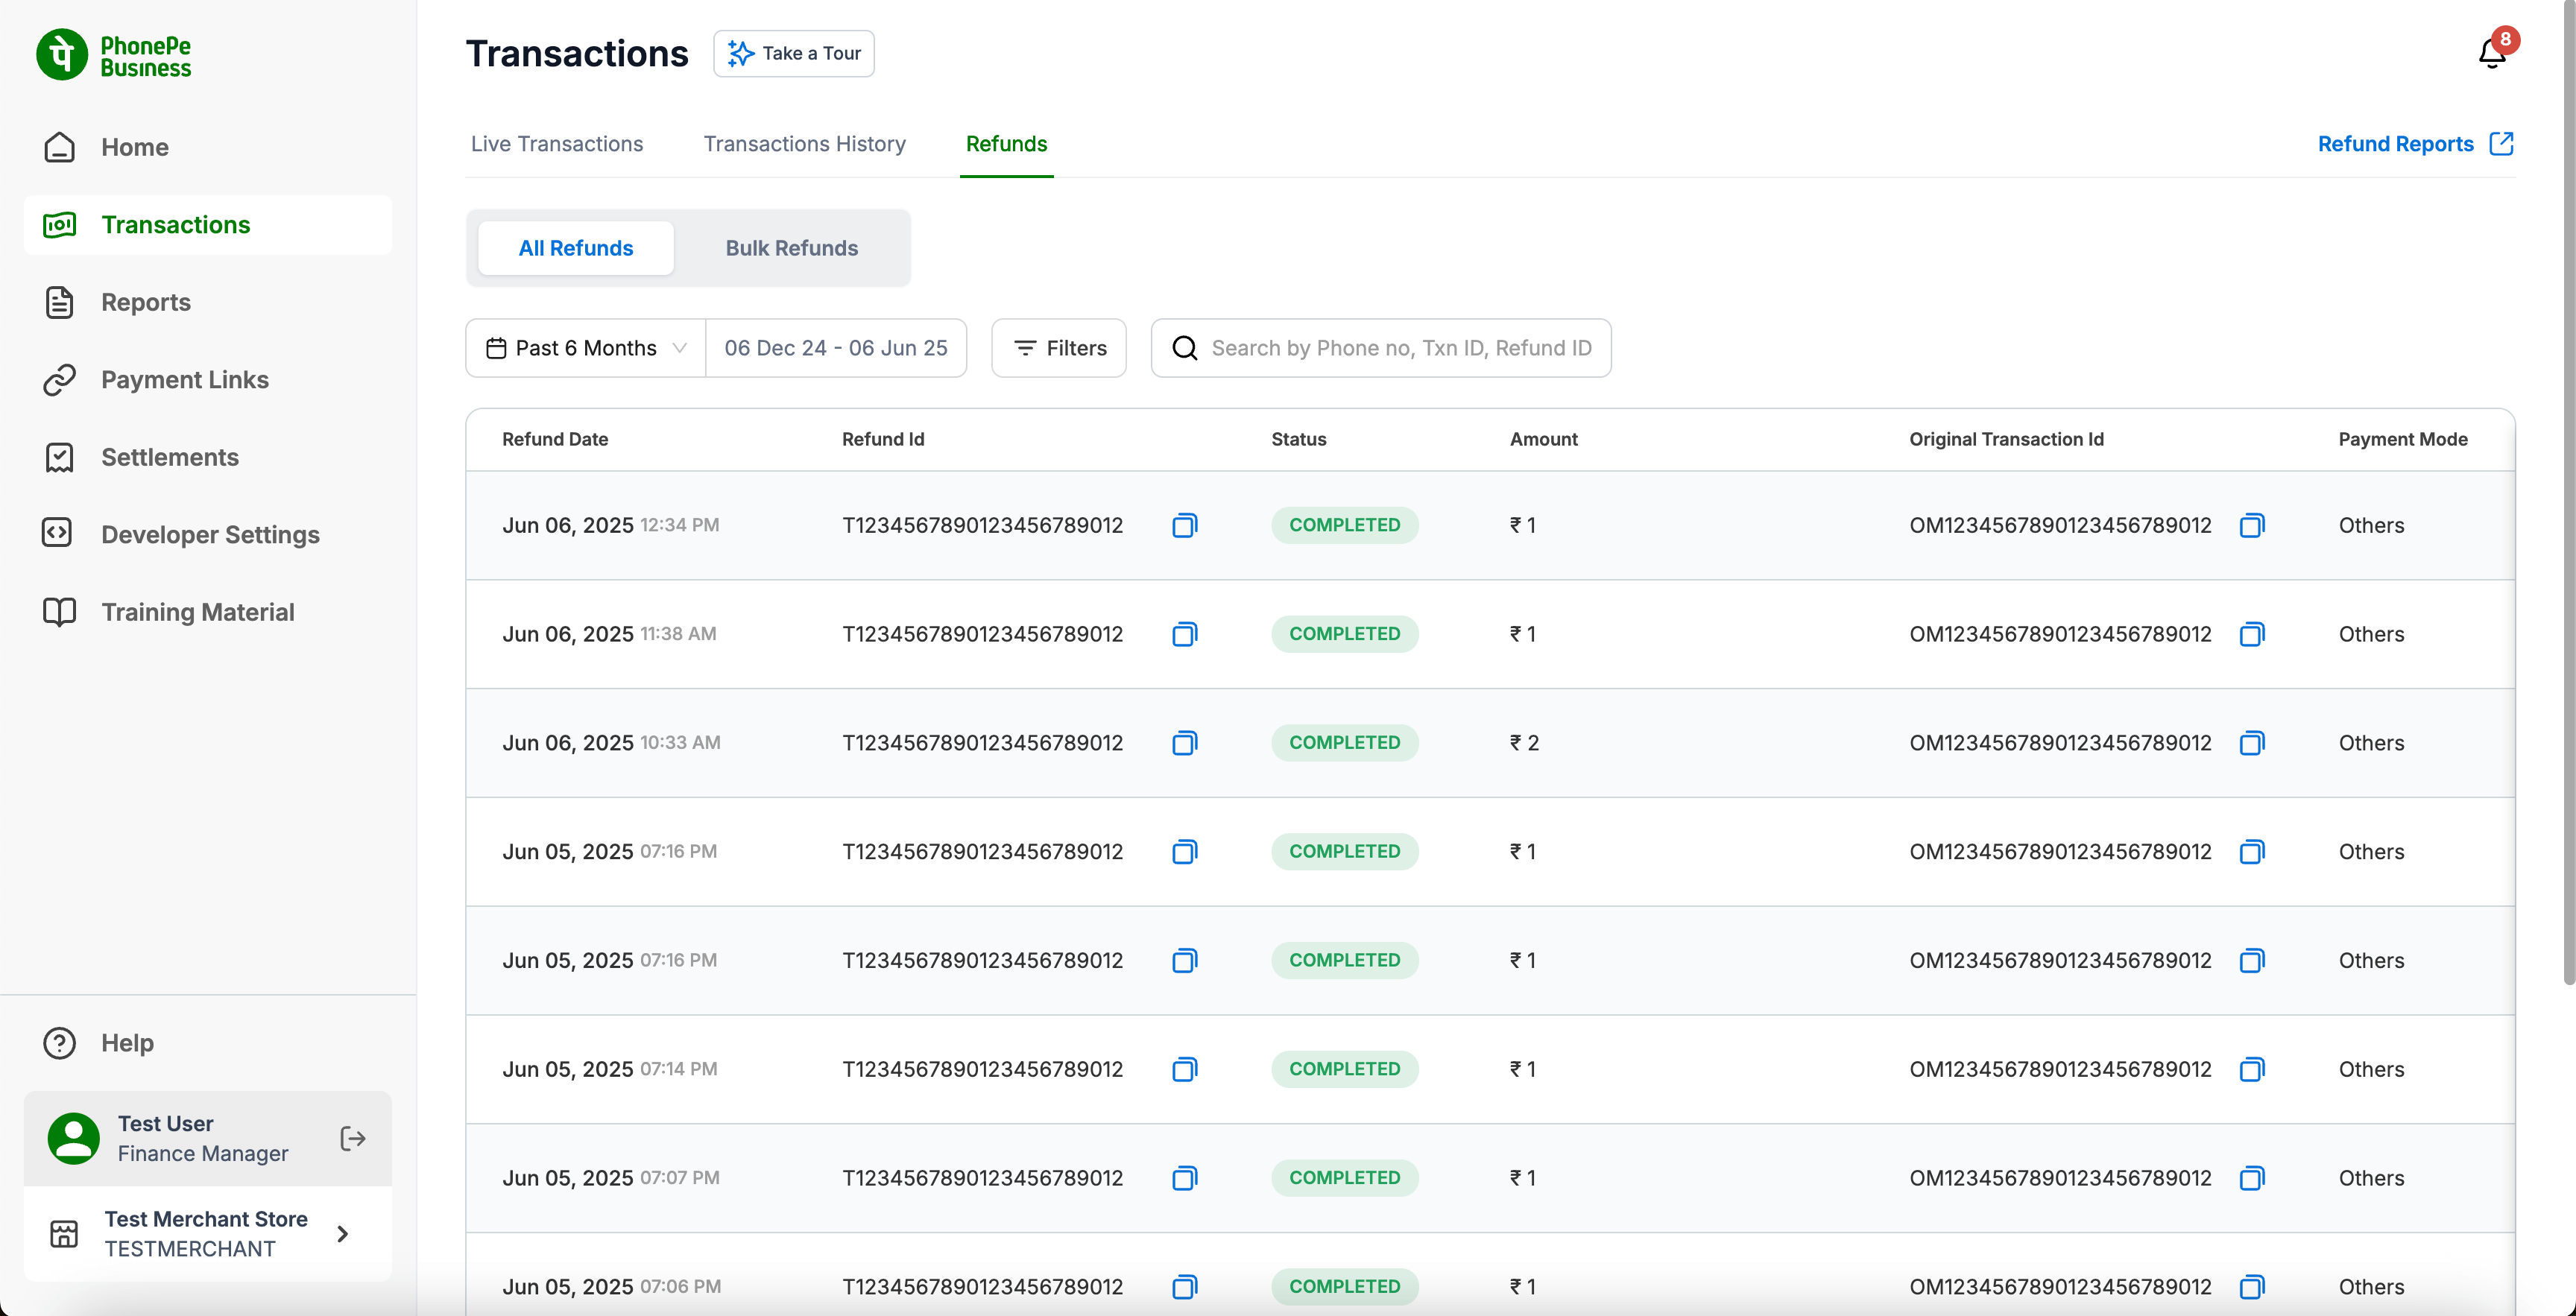
This section displays a detailed history of all refunds and reversals initiated by you to your customers. This includes refunds against payments originally made through PhonePe, as well as direct refunds to customers via their PhonePe ID, even if the original transaction was processed outside PhonePe.
This screen provides a consolidated view and tracking mechanism for all individual refund transactions made by the merchant, ensuring transparency and ease of reconciliation.
Key Elements & Sections:
- Date Selector:
- Defaults to “Past 6 Months,” allowing you to view refund transactions within this period.
- You can click on the date range to specify a different period if needed, though typically it shows a maximum of 6 months of historical data.
- Filters:
- Clicking the “Filters” button allows you to narrow down the refund list based on various criteria. While not explicitly shown in the screenshot, common filters here would include:
- Refund Status: (e.g., Completed, Pending, Failed)
- Payment Mode: The original payment method or the method used for the refund.
- Store/Terminal: If applicable, to filter refunds by specific locations.
- Clicking the “Filters” button allows you to narrow down the refund list based on various criteria. While not explicitly shown in the screenshot, common filters here would include:
- Search Bar:
- Allows you to search for specific refunds using identifiers such as “Phone no,” “Txn ID,” or “Refund ID.”
- Refund Table:
- Displays a detailed list of individual refund transactions with the following columns:
- Refund Date: The date and time the refund was initiated/completed.
- Refund ID: A unique identifier for the refund transaction. (Note: There’s a copy icon next to it for easy copying).
- Status: The current status of the refund (e.g., “COMPLETED”).
- Amount: The amount that was refunded.
- Original Transaction Id: The ID of the original payment transaction that the refund is linked to, if applicable.
- Payment Mode: The mode of payment used for the refund (e.g., “Others” – implying it could be any linked payment method, or PhonePe if against a PhonePe transaction).
- Displays a detailed list of individual refund transactions with the following columns:
- Refund Reports Link: (Top right)
- A direct link to access comprehensive reports specifically related to your refunds.
Refunds > Bulk Refunds
This section is designed for merchants who need to process a large number of refunds simultaneously by uploading a CSV file. This streamlines the refund process for multiple customer transactions.
Key Elements & Sections:
- Date Selector & Filters (for Bulk Refund History):
- Similar to “All Refunds,” you can select a date range (e.g., “All Time”) and apply filters to view your past bulk refund operations.
- Filters: Common filters here might include status of the bulk refund process (e.g., “Processing,” “Completed,” “Failed”).
- Bulk Refund History Table:
- Displays a record of all previously initiated bulk refund batches. Columns typically include:
- Date: The date and time the bulk refund request was initiated.
- Status: The overall status of the bulk refund batch (e.g., “COMPLETED”).
- Refund Reason: A summary or reason provided for the bulk refund.
- Summary: A brief description for the bulk refund batch.
- Uploaded File: A download icon to retrieve the original CSV file that was uploaded for the bulk refund.
- Report: A download icon to access the generated summary report for that specific bulk refund batch.
- Displays a record of all previously initiated bulk refund batches. Columns typically include:
- + Initiate Bulk Refund Button:
- The primary action button on this page, located at the top right. Clicking this button initiates the bulk refund process and opens a modal window.
- “Initiate Bulk Refund” Modal (Step 1/2):
- This modal guides you through the process of uploading your bulk refund file.
- Download Sample Form:
- Provides a link to “Download Sample Document” or “Download Sample Form” (as seen in the screenshot).
- Action: You must download this template first. This CSV file contains the required column headers and format that you need to populate with your refund information.
- Upload Refund File:
- An area to “Click to upload” or “drag and drop” your completed CSV file.
- File Type: Clearly states “File Type: CSV,” indicating the required format for the upload.
- Learn more about File Formats: A link to provide additional information or guidelines regarding the CSV file format and required fields.
- Navigation Buttons: “Cancel” to close the modal, and “Next” to proceed to the next step (e.g., review or confirmation).
How to Initiate a Bulk Refund:
- Click the + Initiate Bulk Refund button.
- In the “Initiate Bulk Refund” modal, click Download Sample Form to get the required CSV template.
- Populate the downloaded CSV file with the refund information. This file must contain specific fields as defined by the template (e.g., Transaction ID, Refund Amount, etc.).
- Once the CSV is ready, upload it by clicking the upload area or dragging your file into it.
- Click Next to proceed. The system will then process the file.
Bulk Refund Processing & Reporting:
- After you upload the CSV file, the system processes the requested refunds.
- Once all refunds from the batch are processed, a summary report is generated and becomes available for download under the “Report” column in the Bulk Refund History table.
- The summary report provides crucial details about the batch processing:
- Total number of refunds requested: The total count of entries in your uploaded CSV.
- Count of successful refunds: The number of refunds that were processed successfully.
- Count of refunds that failed due to other errors: Refunds that could not be processed due to system issues, network problems, etc.
- Count of errors due to exceeding the allowable refundable amount: This indicates instances where the requested refund amount was greater than the original transaction amount, or if a partial refund had already occurred, the remaining refundable balance was insufficient.
- Amount successfully refunded: The total monetary value of all successfully processed refunds in that batch.
Typical Use Case:
A merchant who needs to process refunds for a large batch of orders (e.g., returns from an e-commerce sale, cancelled event tickets) can use the “Bulk Refunds” feature to efficiently handle these transactions without having to process each one individually.
Relevant Screenshots