
Java SDK Integration
To integrate the PhonePe Java SDK, set up the SDK with your clientId, clientSecret, clientVersion, and environment. Use the StandardCheckoutClient class to interact with PhonePe APIs. The SDK supports creating orders, checking order and refund status, initiating refunds, and validating callbacks. All responses and errors are handled using standard response objects and PhonePeException.
1. Install PhonePe SDK
To install the PhonePe Java SDK, you need to add the SDK dependency and repository details to your project configuration. Maven users should include the SDK dependency in the dependencies section of the pom.xml file and define the PhonePe repository under repositories. For Gradle users, the SDK repository URL must be added under the repositories block, and the SDK dependency should be listed in the dependencies block of the build.gradle file. This setup allows your project to access and use the PhonePe SDK for integrating payment features.
To install the PhonePe SDK, refer to the SDK Installation.
2. Class Initialization
The StandardCheckoutClient class is the primary entry point to interact with PhonePe APIs using the Java SDK. Merchant should initialize this class only once during the application runtime. Initialization requires the clientId, clientSecret, clientVersion, and the environment (Env.SANDBOX or Env.PRODUCTION). Re-initializing the client will throw a PhonePeException, so ensure the credentials are accurate before creating the instance.
To set up your Client ID and Client Secret, refer to the Class Initialization.
3. Initiate a Payment
The pay() method is used to initiate a payment through PhonePe PG using the Java SDK. Merchants build a StandardCheckoutPayRequest by providing mandatory details such as merchantOrderId, amount (in paisa), and optional fields like redirectUrl, metaInfo, and paymentModeConfig to control available payment options. The method returns a StandardCheckoutPayResponse containing a redirectUrl, which the merchant uses to forward the customer to PhonePe’s checkout page for payment completion.
To initiate payments, refer to Initiate Payment.
4. Create SDK Order
The createSdkOrder() method is used to generate a token when the merchant backend is built in Java and integrated with a Mobile SDK. The merchant constructs a CreateSdkOrderRequest using the builder, passing in mandatory fields like merchantOrderId, amount, and redirectUrl. On success, it returns a CreateSdkOrderResponse containing a token, which is then used by the mobile app to initiate the order.
To create SDK order, refer to Create SDK Order.
5. Order Status
The getOrderStatus() method allows checking the current status of a payment order using the provided merchantOrderId. It returns key details such as the order’s state (COMPLETED, FAILED, or PENDING), the amount, expiry time, and optional payment attempt details. Each payment attempt includes information like transaction ID, payment mode, status, and any associated error codes or instrument breakdowns.
To create SDK order, refer to Check Order Status.
6. Initiate Refund
To initiate a refund, use the refund() method by passing a RefundRequest containing a unique refund ID, original order ID, and the refund amount (in paise). Once initiated, the refund starts in a PENDING state and may move to COMPLETED or FAILED based on processing.
To check the progress of a refund, the getRefundStatus() method can be used with the refund ID. The status response includes details such as the refund state, amount, and payment method used, along with error codes if the refund failed. Multiple transaction attempts and split instruments are also captured in the response when applicable.
To initiate a refund and check its status, refer to Refund and Refund Status.
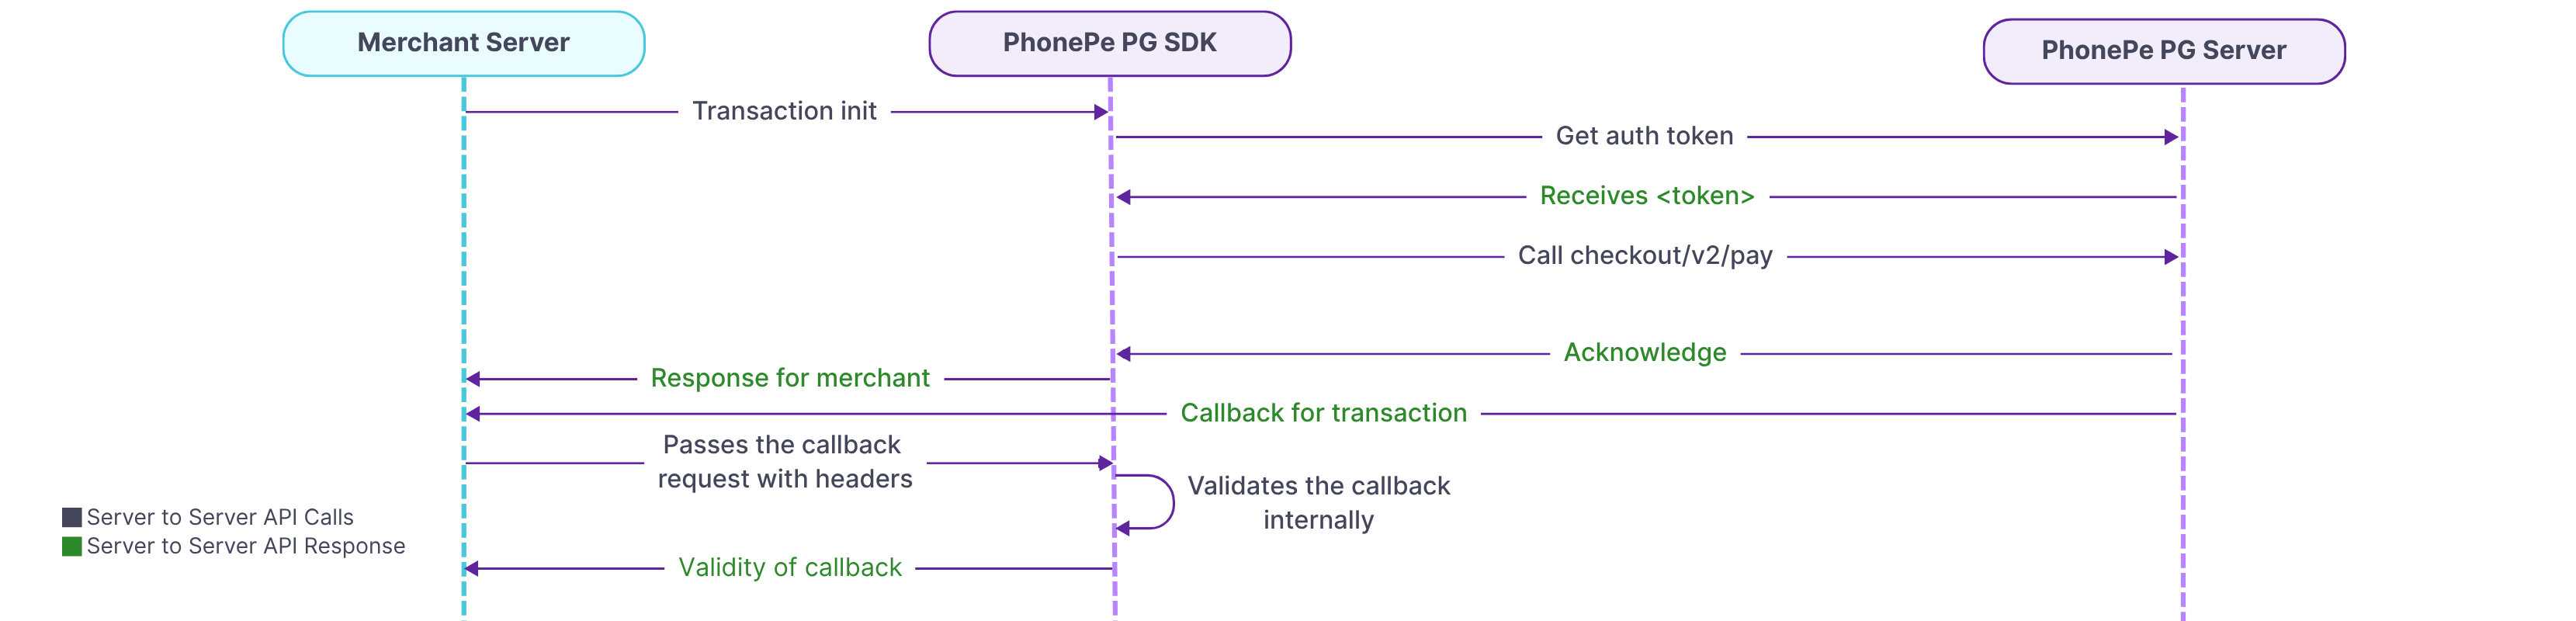
7. Webhook Handling
Use the validateCallback() method to confirm the authenticity of the callback received. Pass the configured username, password, the Authorization header, and the raw response body. If valid, it returns a CallbackResponse containing the event type and transaction details. In case of invalid inputs or mismatched credentials, a PhonePeException is thrown.
To verify the callback refer to Webhook Handling.
8. Exception Handling
All API errors are captured as PhonePeException. This exception provides useful information such as HTTP status code, error message, internal error code, and a detailed data map. You can use this to debug and handle failures gracefully in their integration flow. Additional response models like PaymentRail and PaymentInstrumentV2 are returned under getOrderStatus() to help identify transaction sources and methods.
For complete details, refer to the Exception Handling.
By following the above steps, you can integrate the PhonePe Java SDK to initiate payments, check order and refund statuses, verify callbacks, and handle exceptions, ensuring a smooth and secure payment experience for your customers.
What’s Next?
You’ve now understood the key steps involved in integrating PhonePe Payment Gateway into your website. Let’s begin the actual integration with Installing the SDK.


