
iOS SDK Setup
Follow the steps in this section to integrate PhonePe SDK into your app. This includes adding the required dependencies, initializing the SDK, and configuring the necessary settings to start accepting payments.
To start using the SDK, you’ll need to integrate the PhonePe SDK into your app.
1. Prerequisites to install iOS SDK:
- Install PhonePePayment SDK Using CocoaPods
- To get started, you’ll need CocoaPods to install the PhonePePayment SDK.
- Install CocoaPods (If not already installed)
- If you haven’t installed CocoaPods on your system yet, open your terminal and run the below command.
sudo gem install cocoapods2. iOS App-Side Implementation
- iOS PG SDK Setup
- Add PhonePePayment SDK to Your Podfile
- Navigate to your project folder and create a
Podfileif you don’t have the pod file inside the project folder, run the below command.
pod init- Then, open the Podfile in a text editor and add the following line under the target block:
pod 'PhonePePayment'- Install the Pods
- Now, run the following command to install the SDK and its dependencies:
pod install- Open the .xcworkspace File
- After running pod install command, CocoaPods will generate a .xcworkspace file. From now on, open your project using the .xcworkspace file instead of the .xcodeproj file.
- Configure Info.plist
- To allow PhonePe Payment SDK to communicate with various apps, add URL Schemes to your Info.plist file:
- Add a new Array type node named LSApplicationQueriesSchemes:
<key>LSApplicationQueriesSchemes</key>
<array>
        <string>ppemerchantsdkv1</string>
        <string>ppemerchantsdkv2</string>
        <string>ppemerchantsdkv3</string>
        <string>paytmmp</string>
        <string>credpay</string>
        <string>amazonpay</string>
        <string>bhim</string>
        <string>gpay</string>
</array>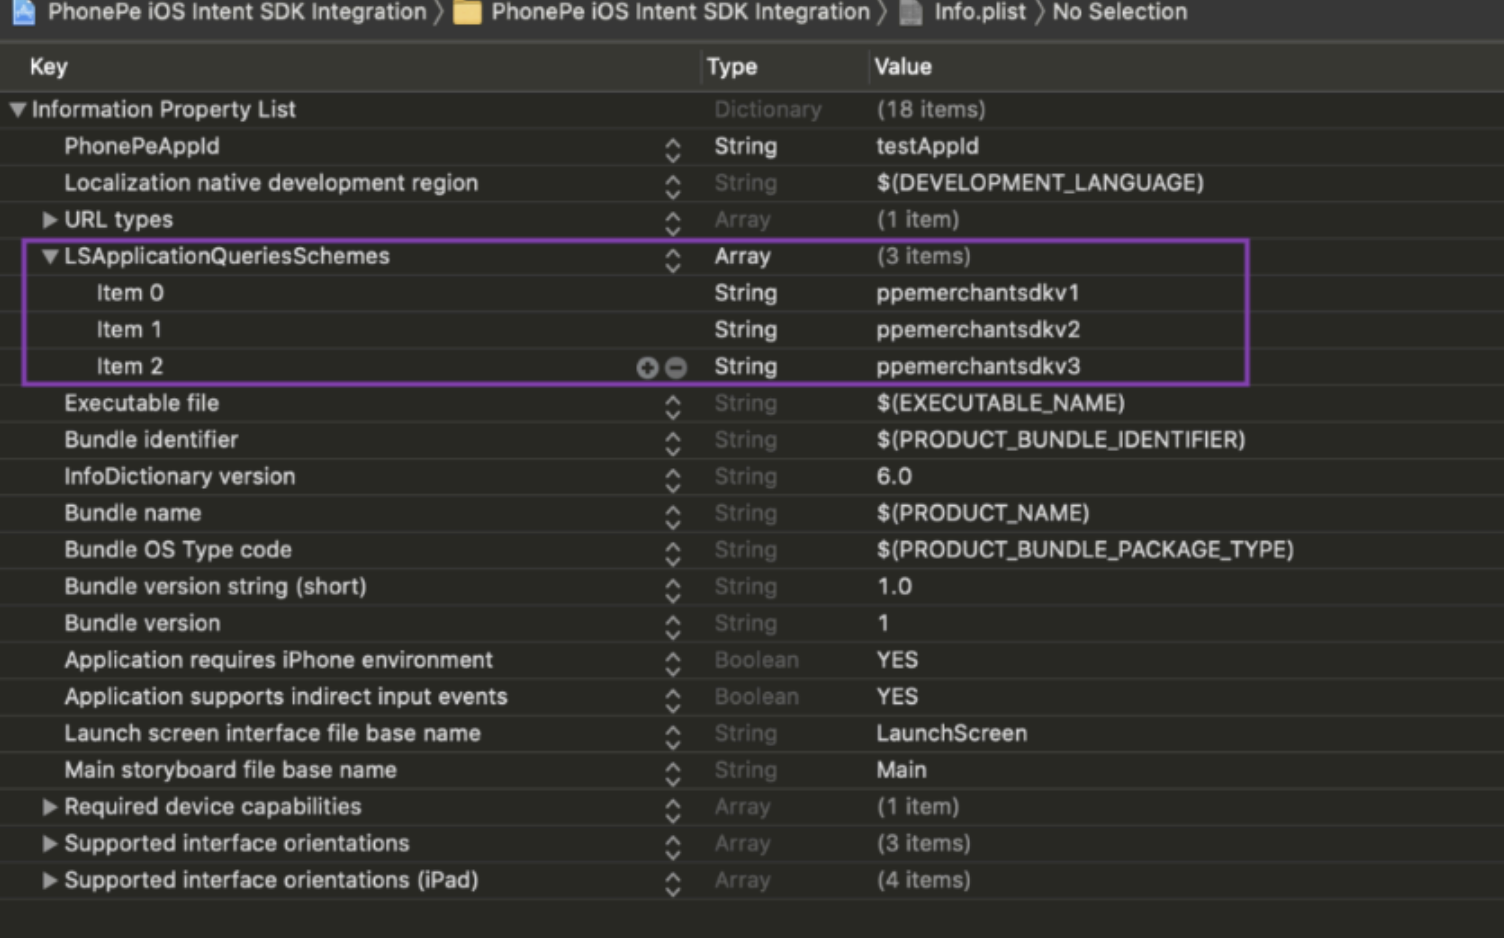
- Create DeepLink Schema
- You need a deep link to redirect the user back to the app after payment completion.
- Create a URL type in the
Info.plist.For example, use “iOSIntentIntegration“. - Define URL scheme conditions:
- Only alphabets (upper/lower case) and numbers.
- Special characters like dots (.) and hyphens (-) are allowed.
- The name should start with an alphabet.

- To Enable Debug Logs
- Update the PPPayment.enableDebugLogs = true or enableLogging flag to true in startPG method.
- Environment :
.Production.Sandbox
- Initialize the SDK
- Initialize iOS
PhonePePaymentSDKby calling thePPPaymentclass with the appropriate parameters. Please refer to the request body below.
- Initialize iOS
let ppPayment = PPPayment(
  environment: .production,
  flowId: "FLOW_ID",
  merchantId: "MERCHANT_ID"
)| Parameter Name | Data Type | Description |
environment | Enum | • .production for Production• .sandbox for PreProd |
merchantId | String | The merchant Id provided by PhonePe PG |
flowId | String | Pass the merchant user Id or the unique string (UUID().uuidString) for every init for analytics purposes |
enableLogging | Boolean | [Optional Parameter] • True (To enable the SDK logs) • False (To disable the SDK logs) Note: In Prod, make sure to set as False. |
Initialize the PPPayment with the selected environment, and provide the orderId and token received from your backend in response to the Create Order API. The SDK will manage the payment process and return the response.
Once the payment is completed and the callback is triggered in your app through the completionHandler, verify the transaction status with your backend.
- Start Checkout Flow
- Now that your SDK is initialized, trigger the checkout flow using the
startCheckoutFlowmethod.
- Now that your SDK is initialized, trigger the checkout flow using the
public func startCheckoutFlow(merchantId: String, orderId: String, token: String, appSchema: appSchema, on viewController: UIViewController, completion: @escaping PhonePePayment.PPTransactionCompletion)

// Example:

ppPayment.startCheckoutFlow(
  merchantId: merchantId,
  orderId: orderId,
  token: token,
  appSchema: appSchema,
  on: vc
) {
  _, state in print(state)
}| Parameter Name | Data Type | Description |
merchantId | String | Unique merchant ID provided by PhonePe PG |
orderId | String | The PhonePe Order ID received in the Create Order API response |
token | String | The order token received in the Create Order API response |
- Handle App Callback (AppDelegate)
- In your
AppDelegate, check for a callback from the PhonePe app and pass it to the SDK:
- In your
func application(_ app: UIApplication, open url: URL, options: [UIApplication.OpenURLOptionsKey : Any] = [:]) -> Bool {
  let handled = PPPayment.checkDeeplink(url)
  if handled {
    // Phonepe is handling this, no need for any processing
    return true
   }
   //Process your own deeplinks here
   return true
}
After this method is called, you will receive control in the completion block.
- Verify Payment Status
- Once redirection back to the merchant app is complete, call the Order Status API or rely on the Webhook Response to update the final status for the user.
3. Server-Side Implementation
- Fetch Auth Token
- Check if a valid Auth Token is already available. If not, call the Fetch Auth Token API to obtain one.
- Call the Create Order API
- Call the Create Order API using the valid Auth Token, by passing the required order details. PhonePe Payment Gateway will return an Order Token in the response.
- Pass SDK Order Token and SDK Order ID to frontend
- Send the SDK Order Token and SDK Order ID from the backend to the frontend app.
- These are then passed to the SDK method:
ppPayment.startCheckoutFlow
- Check the payment status
- After payment completion, check the backend if the Webhook response has been received.
- If the webhook hasn’t arrived:
- Call the Order Status API to fetch the current payment status.
- If the status is a terminal status (e.g.,
COMPLETEDorFAILED), update the order status accordingly. - If the status is PENDING, periodically poll the Order Status API (e.g., every 15 sec, 30 sec, or 1 min) until a terminal status is reached.
What’s Next?
You have completed setting up the iOS SDK in your app. Next, let’s learn how to use the APIs, starting with generating the Authorization token.
Head over to the next section to learn how to Generate Authorization Token.


