
Website Integration
To process a payment using PhonePe’s Standard Checkout, the integration follows a structured sequence of steps that ensures security, reliability, and a smooth customer experience.
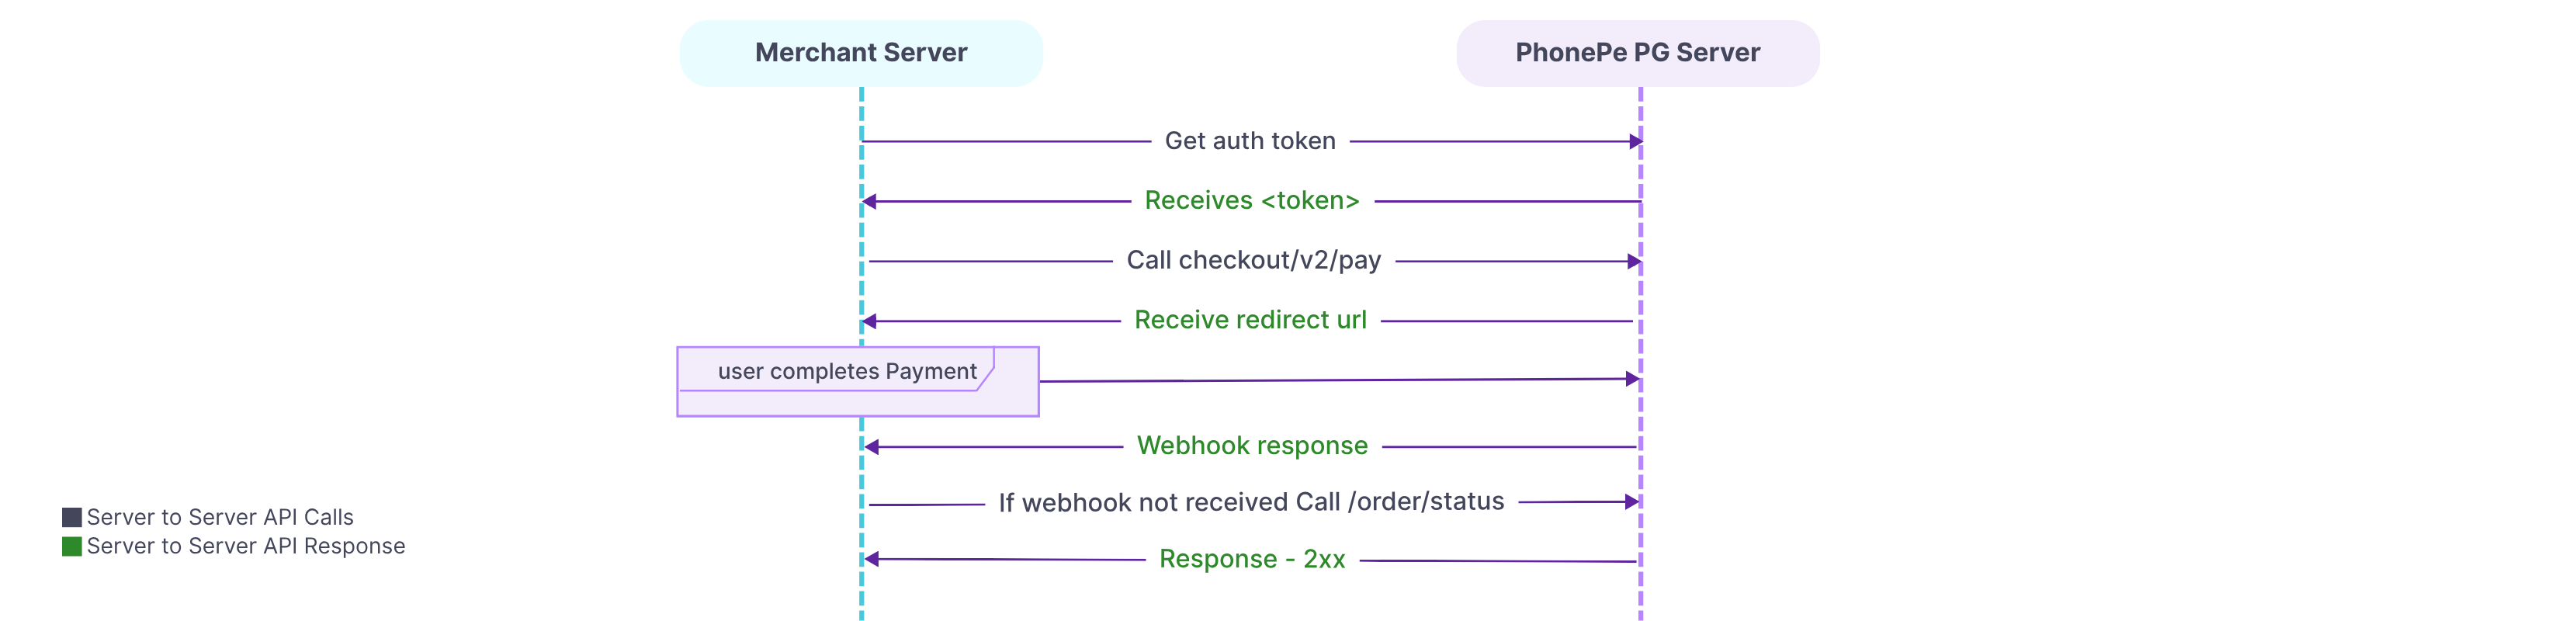
1. Generate Authorization Token
Authentication is the first step in PhonePe Payment Gateway’s standard checkout API integration. It involves generating an authorization token to make further API calls.
Creating an authorization token to make API calls means generating a unique key or password that proves your system has permission to interact with PhonePe Payment Gateway. This token identifies and authenticates your website when it requests services like processing payments, checking status, etc.
For complete details, refer to the Generate Authorization API Reference.
2. Create Payment Request
This includes providing key information such as the transaction amount, a unique order ID, and the redirection URL where the customer will be taken after the payment is completed (whether it is a success or failure).
Important:
- You can pass the expireAfter parameter in the request payload to customise the expiry of the PhonePe Standard Checkout Page
- You can pass the user-defined fields(UDFs) in the metaInfo block to receive the same details in the Status or Webhook response
- You can pass the selected instrument details in the paymentModeConfig block to display/hide the selected instruments as per your needs
For complete details, refer to the Create Payment API Reference.
3. Invoke iframe PayPage
In this step, you’ll integrate and invoke the PayPage on the checkout page of your website. The PayPage acts as the interface where customers complete their payment process.
For complete details, refer to the PayPage.
4. Verify Payment Response
Once a payment is initiated, it’s important to confirm whether it was successful, failed, or still pending. This helps your system take the right next steps, like confirming an order or retrying a payment. There are two ways to verify the payment response:
- Webhook (Server-to-Server Callback) – Recommended
This is an automated notification sent by PhonePe Payment Gateway directly to your server when the status of the payment changes (e.g., success or failure). It ensures real-time updates.- Webhook Event Types
- checkout.order.completed
- checkout.order.failed
- pg.refund.completed
- pg.refund.failed
- Webhook Event Types
- Check Status API :
If you don’t receive the webhook callback, you can use the APIs to manually check the payment status using Order Status.
Important:
- Use the “payload.state” Parameter: For payment status, rely only on the root-level “payload.state” field in the response
- Avoid Strict Deserialization: Don’t use overly strict rules for processing the response
- Use the “event” Parameter: Use the “event” parameter instead to identify the event type
- Time Format: The expireAt and timestamp fields will be in epoch time
What’s Next?
You’ve now understood the key steps involved in integrating PhonePe Payment Gateway into your website. It’s time to begin the actual integration process by generating an authorization token.
Head over to the next section to learn how to securely authenticate your API requests using our Authorization API.


