
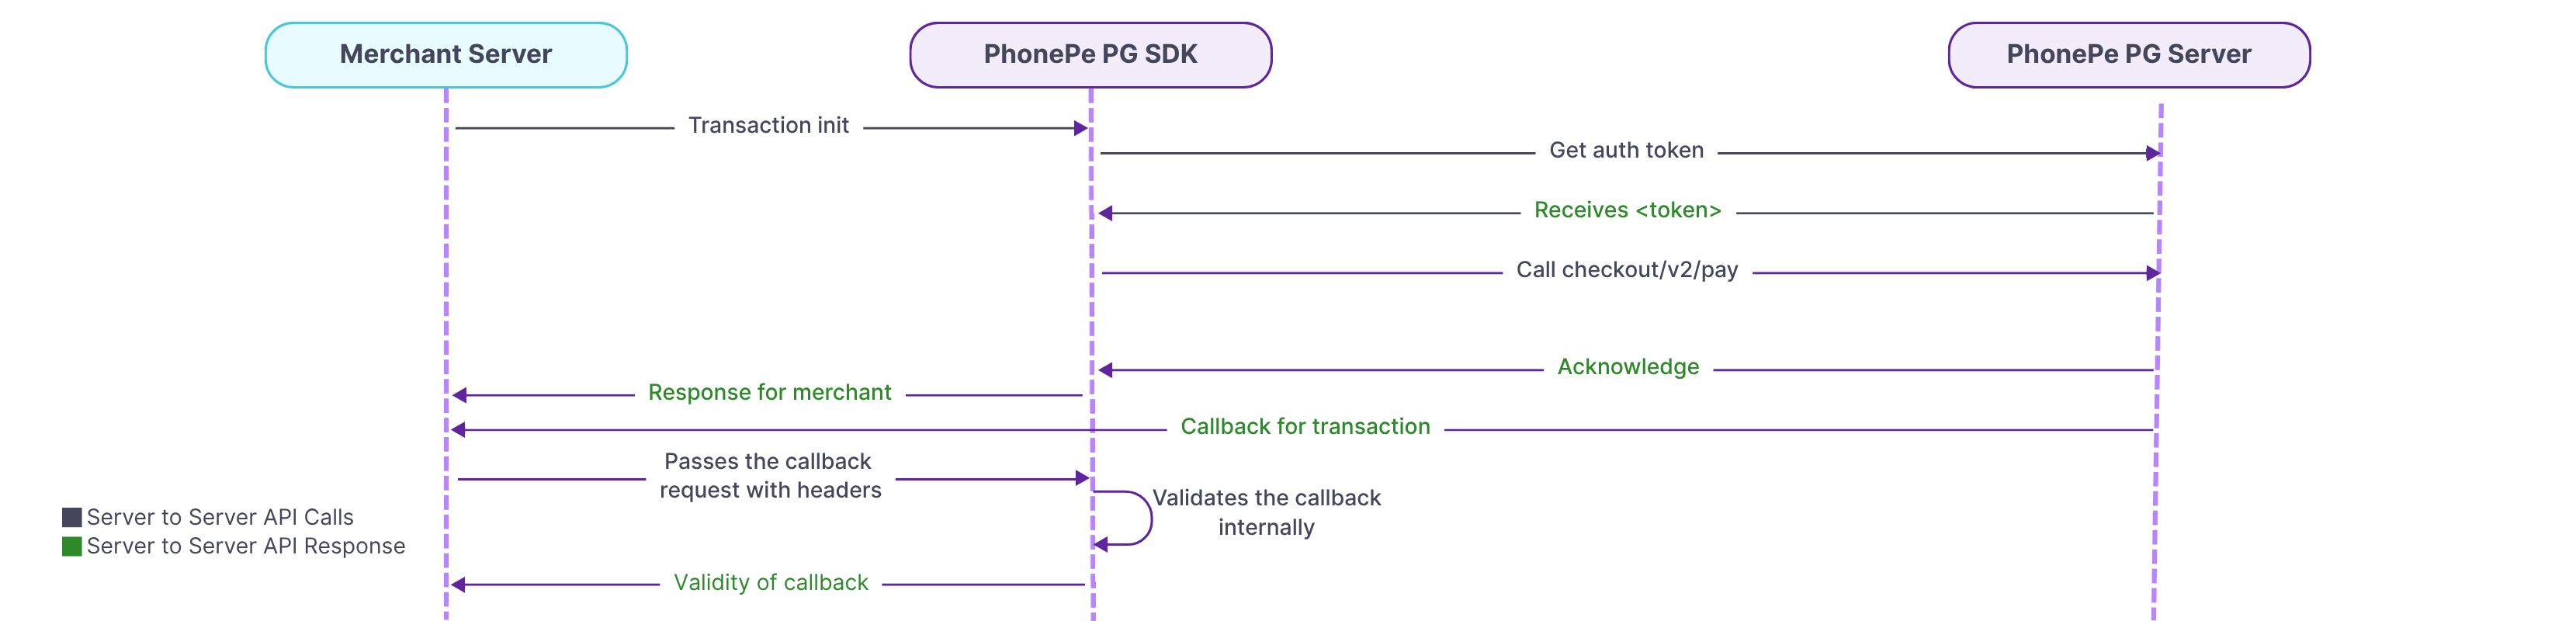
Node.js SDK Integration
To integrate the PhonePe Node.js SDK, install the SDK package and initialize StandardCheckoutClient using your credentials. This sets up secure communication with PhonePe and allows the merchant to request payments, handle refunds, fetch order statuses, and verify callbacks during the payment journey.
1. Install PhonePe SDK
To start using the PhonePe Node.js SDK, first install it using the provided npm command. After installation, you will need your client ID and client secret to initialize the SDK.
To install the PhonePe SDK, refer to the SDK Installation.
2. Class Initialization
The StandardCheckoutClient class is used to connect with PhonePe. You must initialize it once using your client ID, client secret, client version, and environment. Creating multiple instances will throw a PhonePeException. Use this client to make all payment-related requests.
To set up your Client ID and Client Secret, refer to the Class Initialization.
3. Initiate Payment
Use StandardCheckoutPayRequest.build_request() to create a payment request by setting details like merchantOrder ID, amount, redirect URL, and optional metadata. Pass this request to the pay() method to get a checkout URL, which redirects the customer to complete the payment.
To initiate payments, refer to Initiate Payment.
4. Create SDK Order
Use CreateSdkOrderRequest.StandardCheckoutBuilder() to generate an order token when your backend is in Node.js and the payment is triggered from a mobile SDK. This token is needed by the frontend app to initiate the payment. Set attributes like order ID, amount, and redirect URL while building the request.
To create SDK order, refer to Create SDK Order.
5. Check Order Status
Use client.getOrderStatus(merchantOrderId) to check the current status of an order. You can choose to view either the latest payment attempt. The response includes order status, amount, and detailed payment information such as transaction state, payment mode, and error codes if any.
To create SDK order, refer to Check Order Status.
6. Initiate Refund
Use the refund() function to initiate a refund by passing the order ID, refund ID, and amount through RefundRequest.builder(). The response includes the refund status and amount refunded.
To check the status of an initiated refund, use getRefundStatus(refundId). The response provides the current refund state along with payment details such as transaction ID, payment mode, and error codes if the refund failed.
To initiate a refund and check its status, refer to Refund and Refund Status.
7. Webhook Handling
Use the validateCallback() method to verify the authenticity of a callback received from PhonePe. Pass your configured username, password, the Authorization header value, and the response body string. The method returns a CallbackResponse object that confirms if the callback is valid and includes event type, state, order or refund details, and payment information. This ensures only trusted callback events are processed in your system.
To verify the callback refer to Webhook Handling.
8. Exception Handling
Handle errors using the PhonePeException class, which captures all issues that occur during API interactions. The exception provides key details like HTTP status, error code, message, and data. Use try-catch blocks to catch exceptions and log or display error information as needed. This ensures your integration handles failures gracefully and provides clarity during debugging.
To handle errors and unexpected responses, refer to Exception Handling.
By following the above steps, you can integrate the PhonePe Node.js SDK to initiate payments, check order and refund statuses, verify callbacks, and handle exceptions, ensuring a smooth and secure payment experience for your customers.
What’s Next?
You’ve now understood the key steps involved in integrating PhonePe Payment Gateway into your website. Let’s begin the actual integration with Class Initialization.


