
.NET SDK Integration
To interact with PhonePe APIs using the .NET SDK, you must install and initialize the StandardCheckoutClient class with your credentials. This class should be created only once during the application’s runtime using the clientId, clientSecret, clientVersion, and environment values. These credentials are provided to you at the time of onboarding. If you attempt to reinitialize the class in the same runtime, a PhonePeException will be triggered to prevent multiple instances. This approach ensures secure and consistent integration with the SDK.
1. Install PhonePe SDK
To install the PhonePe Payment Gateway SDK for .NET, make sure your application is running on .NET version 8 or above. The SDK helps you easily integrate core backend features such as order creation, payment status tracking, and webhook event handling. Once the version requirement is met, you can proceed to install the SDK in your project.
To install the PhonePe SDK, refer to the SDK Installation.
2. Class Initialization
To interact with PhonePe APIs using the .NET SDK, you must install and initialize the StandardCheckoutClient class with your credentials. This class should be created only once during the application’s runtime using the clientId, clientSecret, clientVersion, and environment values. These credentials are provided to you at the time of onboarding.
To set up your Client ID and Client Secret, refer to the Class Initialization.
3. Initiate Payment
To initiate a payment, build a StandardCheckoutPayRequest with order ID, amount, and optional fields like redirect URL or meta info. Call the pay method to receive a redirect URL for customer payment. The response includes the order ID, payment state, and expiry time.
To initiate payments, refer to Initiate Payment.
4. Create SDK Order
To initiate a payment, build a StandardCheckoutPayRequest with order ID, To create a new order for SDK-based payments, use the createSdkOrder() method by passing a CreateSdkOrderRequest with merchant order ID, amount in paisa, and redirect URL. This method returns a CreateSdkOrderResponse containing the PhonePe order ID, order state, expiry time, and a token. The token is essential for initiating the payment through the UI on the client side.
To initiate payments, refer to Create SDK Order.
5. Check Order Status
To fetch the current status of an order, use the GetOrderStatus method with the merchantOrderId. You can choose to retrieve either only the latest payment attempt or all attempts. The response includes the order ID, payment state, amount, and expiry time, along with a detailed list of transaction attempts, each containing mode of payment, transaction state, timestamps, and instrument details.
To create SDK order, refer to Check Order Status.
6. Initiate Refund
To initiate a refund, use the refund() method by passing the merchant refund ID, original order ID, and refund amount in paisa. The refund amount should be less than or equal to the original transaction amount. A successful call returns a RefundResponse with the refund ID, amount, and current state.
To check the refund status, use the getRefundStatus() method with the same refund ID. The response includes the refund state, timestamp, payment mode, and details of each attempt. This allows merchants to track the progress and outcome of each refund initiated.
To initiate a refund and check its status, refer to Refund and Refund Status.
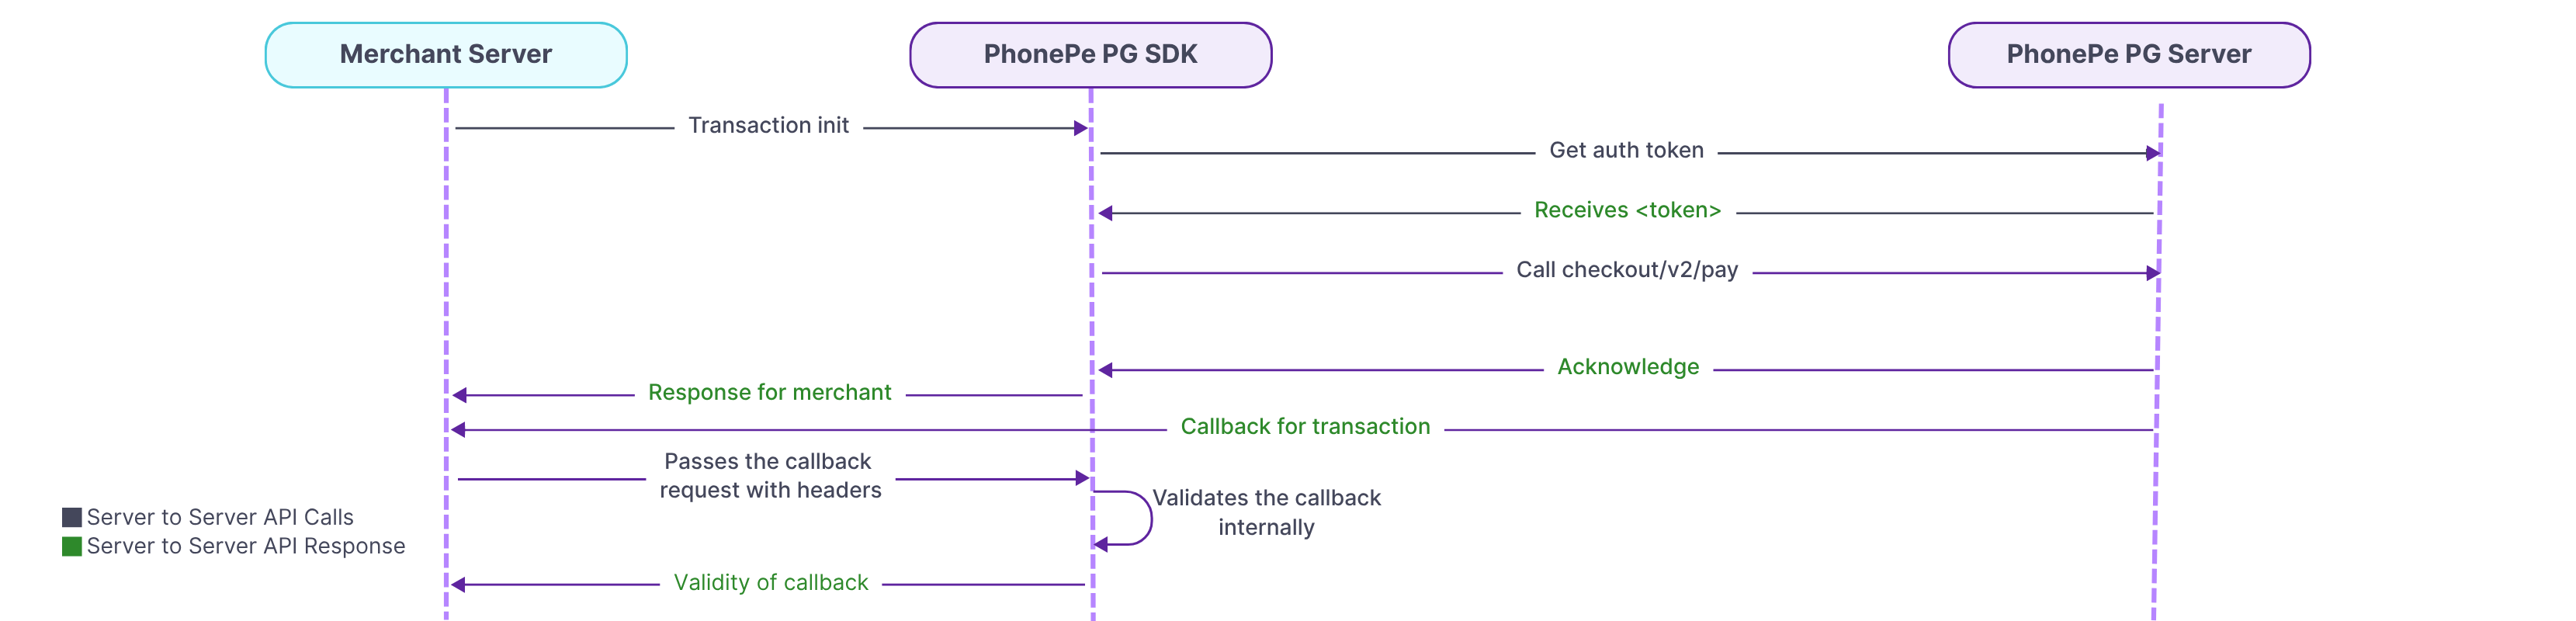
7. Webhook Handling
To verify the authenticity of a callback received from PhonePe, use the ValidateCallback() method. Provide the configured username, password, the Authorization header from the response, and the raw callback body. If the validation is successful, it returns a CallbackResponse containing order or refund details. If the verification fails, a PhonePeException is thrown.
To verify the callback refer to Webhook Handling.
8. Exception Handling
To handle errors while interacting with PhonePe APIs, the SDK throws a PhonePeException. This exception provides key details such as the HTTP status code, error message, error code, and additional data returned by the API. You can use standard try-catch blocks to gracefully handle these exceptions during API calls.
For complete details, refer to the Exception Handling.
By following the above steps, you can integrate the PhonePe .NET SDK to initiate payments, check order and refund statuses, verify callbacks, and handle exceptions, ensuring a smooth and secure payment experience for your customers.
What’s Next?
You’ve now understood the key steps involved in integrating PhonePe Payment Gateway into your website. Let’s begin the actual integration with Installing the SDK.


